"If I can Reload, So can you"
By Mark Pixler(Blue Press) and Gary Kieft (The Human Manual),
"Years ago I bought a book entitled Juggling for the Complete Klutz by John Cassidy, B.C. Rimbeaux and illustrated by Diane Waller. It came with three beanbags and purported to teach even the complete klutz how to juggle. Well, to make a long, embarrassing story short, either I’m an “incomplete” klutz or something even more extreme than merely klutzy. That being said, EVEN I can reload! Like most people who become interested in reloading their own ammunition, I started because I wanted to save money! In order to become a better shot, the simple fact is that you have to practice. Practice uses up ammo – LOTs of it. Reloading your own ammunition makes shooting MUCH more affordable. Period.
That’s why I do it. That’s why most everybody does it. Simple math: DIY ammo + save $ = shoot more! Another thing to consider these days is the quality of the ammunition that’s available. If you’re trying to save money by purchasing bargain-basement ammo – either from somewhere “off shore” or from a commercial loader of unknown origin – you have to ask yourself, “Do I really want to shoot this ammo in MY gun?” When you load your own ammo, you KNOW what you’re shooting. You crafted it, you checked it, you know it’s quality ammo. Period, end of story. But, many are somewhat intimidated by the idea of reloading, believing it to be both complicated and time consuming.
Neither is true. Since the 1980s, when our founder Mike Dillon made progressive reloading equipment affordable for the average shooter reloading your own ammunition has become both quick and easy. "
In his original advertising copy, Mike broke down the reloading process into simple steps: “To reload a fired cartridge case, six steps are necessary:
(1) push out the old primer, referred to as ‘decapping,’ and re-prime the case;
(2) squeeze the case down to its original size, referred to as ‘resizing’;
(3) expand the mouth of the case so a new bullet can be pushed into it;
(4) pour a measured amount of powder into the case;
(5) push a new bullet into the case, referred to as ‘seating the bullet’; and
(6) form the mouth of the case in against the bullet, referred to as ‘crimping.’”
Mike noted that, “In the old days, these steps were done one at a time in single-stage presses and produced loaded ammo at about 50 rounds per hour. Dillon progressive machines, however, do all of these steps at the same time. They work like a bottling machine rotating the cartridges from station to station and produce a loaded cartridge with each stroke of the handle.” Ah, yes, “a loaded cartridge with each stroke of the handle.” That’s what makes progressive reloading equipment so much better than single-stage presses: they require MUCH LESS WORK! They’re faster, too! You can reload from 350 to 1000 rounds of ammunition per hour on Dillon Precision reloading equipment. To get started, let’s talk about the basics: An ammunition cartridge consists of four components: (1) the cartridge case (2) the projectile or “bullet” (3) the propellant or “gunpowder” and (4) the primer. For our purposes, the cartridge case is the star of the show
"If you’re thinking about reloading, the first step is to PICK UP YOUR BRASS! That’s free MONEY lying on the ground."
It holds all the other components in proper formation until the firearm does its job: striking the primer that ignites the powder charge, creating the expanding gasses that propel the bullet out the barrel and downrange to the target. The cartridge case concerns us most because it’s the only component that can be re-used. That cartridge cases ARE reusable makes the reloadingequipment industry possible, because they’re the single most expensive component of a cartridge, making them worthwhile to recycle. So, if you’re a shooter and thinking about reloading, the first step is to PICK UP YOUR BRASS! That’s free MONEY lying on the ground. If your friends are shooting the same caliber ammo as you, and aren’t (yet) interested in reloading, then pick up THEIR BRASS, too! Once you’ve accumulated enough empty cases (say, from 500 – 1000), you have a good reason to start loading. As for the other components, that’s where you’re going to want to seek some advice. It’s not that it’s complicated; it’s just that there are different shooting sports and activities that require different components. The good news is that reloading experts with YEARS of experience are a toll-free phone call or e-mail away at Dillon Precision. They’ll be happy to lead you in the right direction, recommending gunpowder, bullets and primers that fit your needs.
They’ll also direct you to other reliable resources that are available to give you more information. OK, so let’s assume you’ve decided to start loading. Selecting a loading machine isn’t rocket science either. The decision basically involves what you plan to load for and how much you plan to shoot. Dillon manufactures equipment that covers the whole spectrum of shooting from the person who only wants to load for one pistol, to an enthusiast who dabbles in several pistol and rifle calibers, to the serious competitor who shoots thousands of rounds per year. Whichever Dillon reloading machine you pick (and, frankly, even if you pick someone else’s) you have a best friend at the Dillon factory. Like I said before, our customer service representatives possess a wealth of knowledge about reloading in general, and reloading on Dillon equipment in particular. Remember, we’re only a toll-free phone call or e-mail away, and we’ll be glad to answer any questions you might have about reloading or talk you through ANYTHING you need help with on our equipment, from initial set-up to troubleshooting along the way. There are NO “stupid” questions, and we’ve seen or heard of just about every possible situation that comes up while reloading. So, given that, what are you waiting for? Discover reloading!
1. Why reload?
There are several benefits to reloading your own ammunition instead of using factory ammunition.
First, there are substantial cost savings in reusing the cartridge cases you already have. Most cartridge cases can be reloaded anywhere from 5 or 6 to 15-20 times. This results in savings from 30-60 percent over the costs of factory ammunition.
Ammunition Independence
The ability to reload the ammunition you use means you are not dependent on the retail supply chain. This supply chain can be bent or broken by overwhelming demand, government interference, and raw material availability. If you reload your own ammo, you are more independent of any variations in supplies.
Next, by reloading your own ammunition you can craft the ammunition to match your shooting needs. Whether you are hunting, and want to use a premium or lead-free bullet, or are a competitive shooter and need to load to a specific power factor, reloading your own ammunition gives you complete control over the final product. For obsolete cartridges, reloading is often the only way to obtain usable ammunition.
Finally, for many people, reloading is an enjoyable hobby in and of itself. You have great freedom of experimentation to determine what combination of bullet, powder, primer and brass provide the best performance in your firearm. Safety First! Reloading ammunition involves the use of highly explosive primers and powder. Handling these materials is inherently dangerous. You should recognize this danger and take certain minimum precautions to lessen your exposure to injury. Never operate any machine without wearing safety glasses and hearing protection. Never force the operating handle! If some portion of the operation of the equipment suddenly requires undue pressure, stop and determine the cause. Do not apply more force in an attempt to overcome a problem, as it often result in primer explosions or damage to the equipment.
2. What can and can’t you reload
In general, most centerfire, boxer-primed rifle and handgun ammunition is reloadable. The loading of shotgun ammunition, such as 12 gauge, 20 gauge, etc., requires a completely different machine than that used to load rifle or handgun ammunition. Boxer primers are located in the middle of the head of the case, have a centrally located flash hole for the flame from the primer to ignite the powder charge. Additionally, the anvil for the primer is a piece of the primer itself. However, some types of ammunition are NOT reloadable. Rimfire ammunition, such as .22 Long Rifle, .22 Magnum and .17 HMR are are not reloadable. This means the priming compound that ignites the powder is contained within a thin, crushable ridge located on the outer edge of the base of the case. It is not possible to iron out the dent from firing these cases, nor is the priming compound used to prime rimfire cases commercially available.
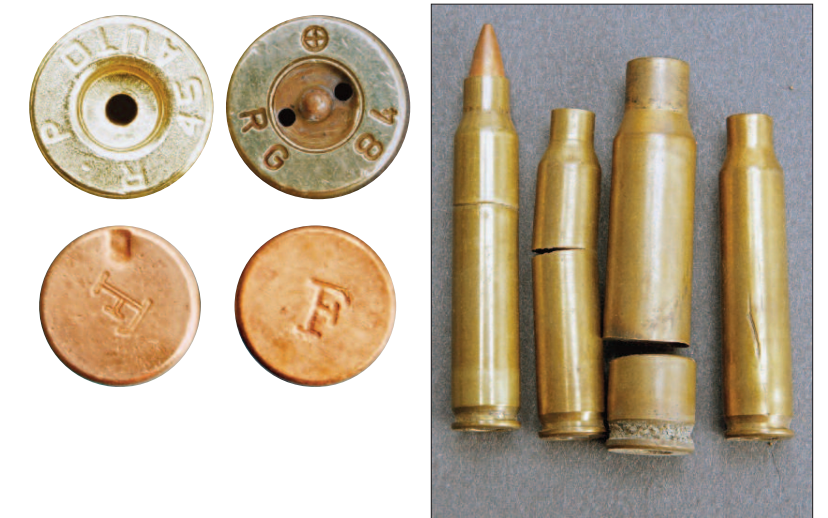
Berdan primers resemble Boxer primers on the outside, in that they are located in the middle of the head of the case. This is where all resemblance ends. Berdan-primed cases have one or two smaller, offset flash holes, and are not able to be deprimed using the depriming assembly in the size die. In fact, attempting to do so will always damage the depriming assembly. Additionally, the anvil for the primer is built into the primer pocket of the case. Therefore, Boxer primers cannot be used in Berdanprimed cases. Finally, Berdan primers are typically of different diameters and heights than Boxer primers, preventing their interchangeability. Berdan-primed ammunition is primaDiscover Reloading With For many people, reloading is an enjoyable hobby in and of itself. rily manufactured overseas. Some of it is easily identified by having cartridge cases made from steel instead of brass. [HINT: use a magnet to quickly sort out the steel cases.] Otherwise, the most reliable way to know is to look inside the case and view the flash hole(s) location.

3. Case inspection
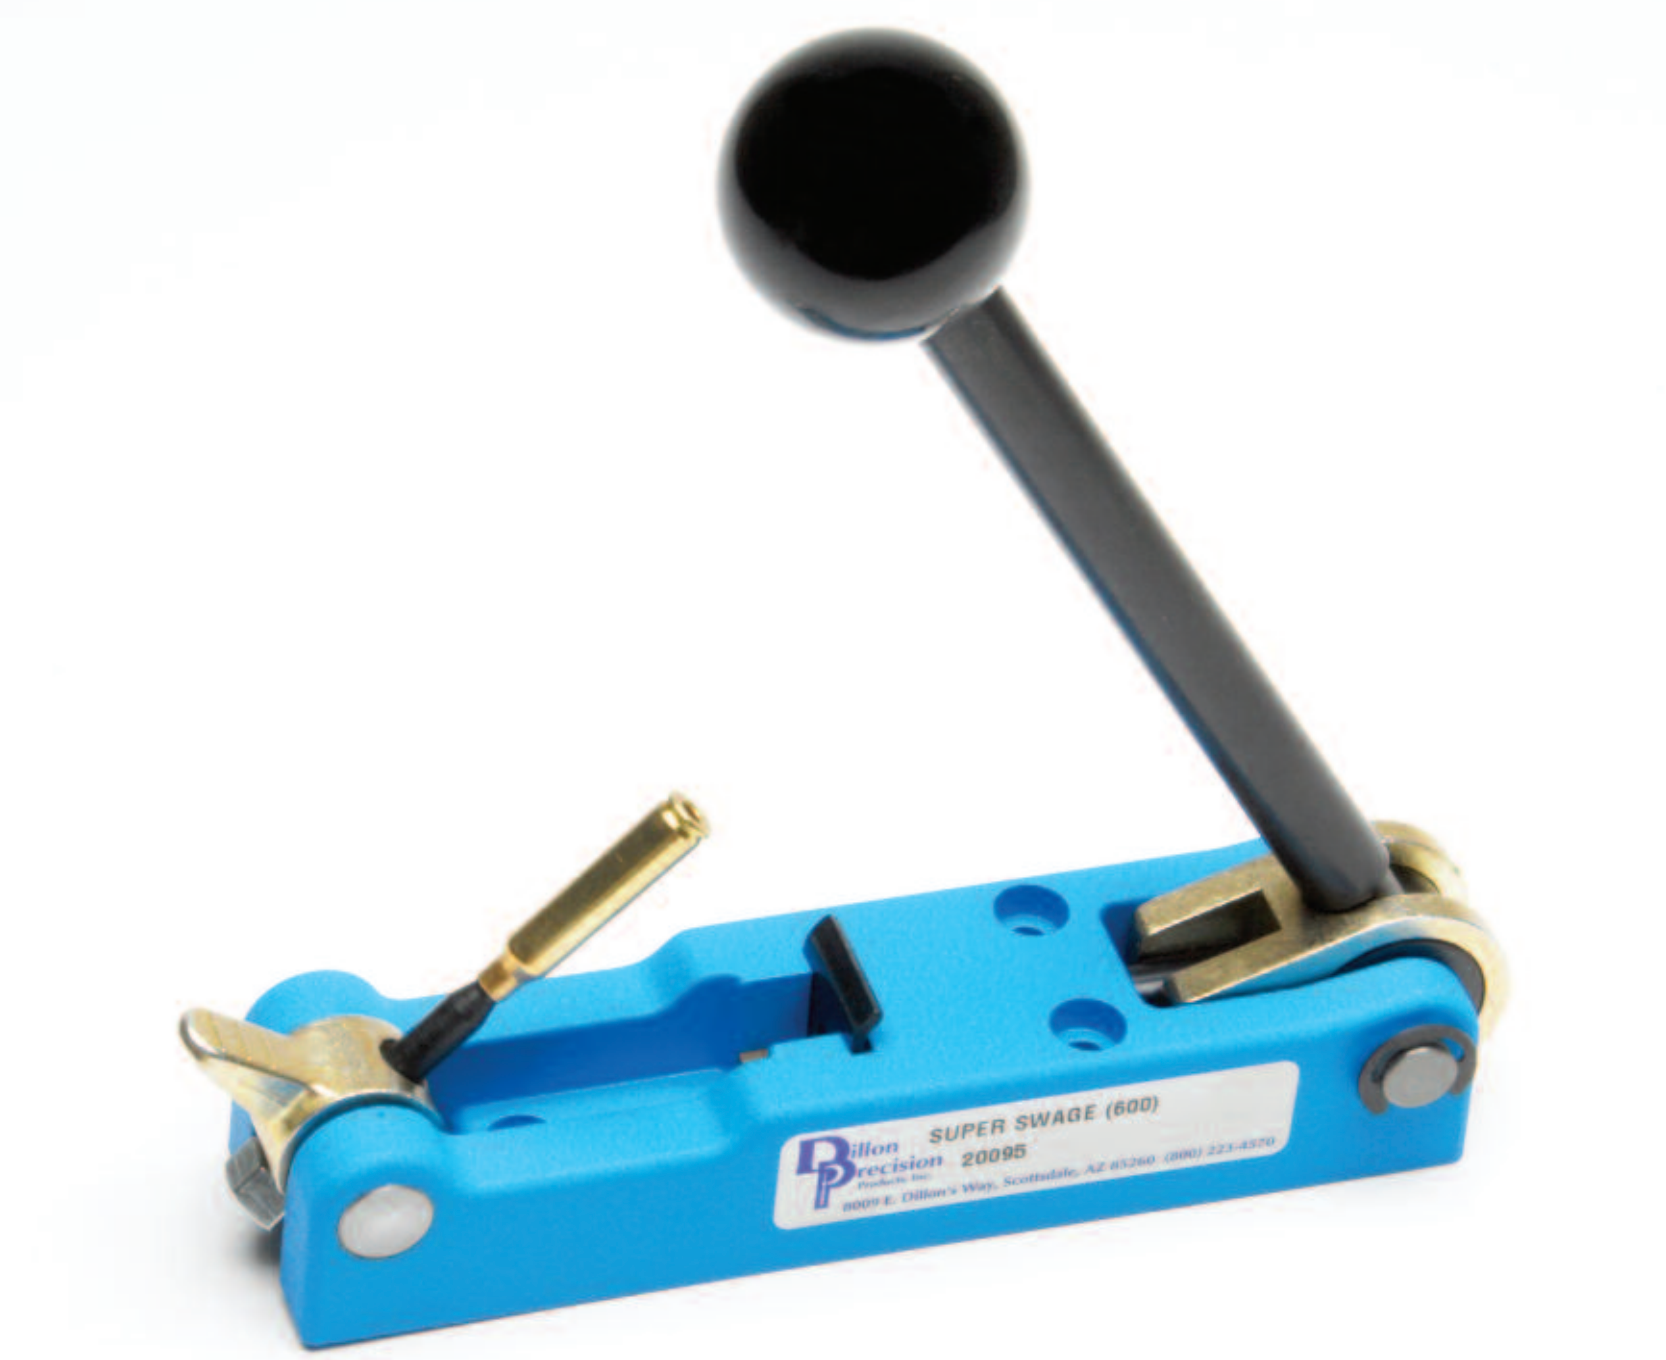
Before you begin reloading, you should always visually inspect your fired cases, removing the cases that are either not suitable for reloading or require additional processing before they can be reloaded. Defects or special conditions to look for, and separate from reloadable brass include: Cracks in case necks. Handgun cases can typically be reloaded 10-20 times before the case mouth cracks. Once it cracks, it is unsafe to reload and should be discarded. The lifespan of rifle cases is more variable. Cases fired in a semiautomatic or lever-action rifle typically have a shorter lifespan (5 or 6 reloadings) than cases fired in a bolt action or single shot rifle (8 or 9 reloadings). Berdan primed cases should be separated and discarded. Cases made from steel or aluminum should be separated and discarded. US military cartridge cases, which have crimped in Boxer primers. While US military cases are Boxer primed, they undergo an additional step during the manufacturing process generally not done to commercial ammunition. After the primer is seated, a special forming station forces brass from the case head over the edge of the primer. The reason for this is so that in an under-pressured cartridge, the primer won’t blow out of the primer pocket and cause a firearm malfunction. Primers are made of sheet brass, and will easily deform to push out past this crimp. However, the crimp interferes with seating the new primer. This crimp must be removed, most often by swaging, so that a new primer may be inserted into the case. Swaging is a one-time operation. Once cases have been swaged, they can be reprimed just like commercial cases.
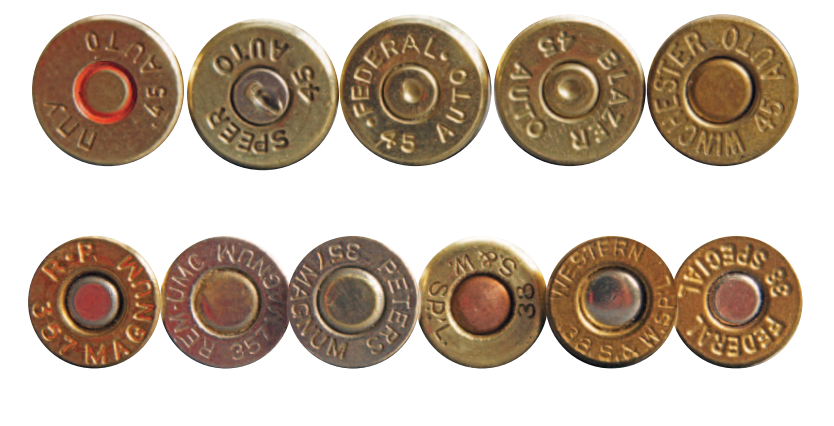
In some instances, the cartridge cases for one caliber are made using multiple sizes of primers. Most notably, .45 ACP is now made using both large and small pistol primers, by a variety of manufacturers. US commercial 7.62x39mm ammunition is also made with different sizes of primer pockets, depending upon the manufacturer. Back in the 1930s and 1940s some .357 Magnum and .38 Special cases were made to use large pistol primers. It is unusual to run across this type of cartridge cases anymore, but they do exist. For best accuracy, and when loading ammunition at the maximum pressure levels, cases should be sorted by brand. Not all cases have the same internal capacity. Powder charge weights that would be safe in one brand of brass could be an overload in another brand. Military rifle brass is usually 10 percent thicker than commercial rifle brass. Check your loading data to see what type of brass was used to develop the data. If commercial brass was used, you should reduce the starting load by 10 percent to prevent an overload. For best accuracy and most consistent velocity, use the same brand of brass when reloading.

4. Case cleaning
The primary reason to clean cases before reloading is to remove any dirt or grit from the exterior of the cases that might scratch the dies, or more importantly, the chamber of your firearm. You also want to make sure no debris, such as mud, dirt, insect nests or smaller cases are inside the case. The fact that the cases are bright and shiny has no effect on accuracy or reliability. Since the early 1960s, no US-made ammunition has used corrosive primers. Current priming compounds do not leave enough residue in the primer pocket to cause problems seating a new primer. Don’t waste time and effort cleaning primer pockets. There are two commonly used methods of cleaning cases, dry media and wet media. Dry media cleaning uses a mildly abrasive material, typically ground corncob or ground walnut shells in a vibrating bowl to clean and polish the cases. It typically takes 1-1/2 to 2 hours of vibration to clean and polish a batch of cases. Walnut is the more abrasive than corncob cleaning media, and is only recommended for use with cases that are stained or tarnished. Corncob is recommended for cleaning and polishing of most fired cases. Walnut is more brittle than corncob, and has a shorter lifespan. With both types of cleaning media it is recommended that a small amount of polish be added to them before you begin to clean cases. The polish aids in cleaning and polishing, and extends the life of the media.
Wet media cleaning takes more time, and has additional handling steps. The cases need to be deprimed first, so that no moisture gets trapped in the primer pockets. Wet media usually consists of small stainless steel pins in soapy water, in some sort of vibrating or rotating bowl. These scour both the inside and the outside of the cases to clean them. There are several disadvantages to wet cleaning. First, the cleaned cases must be rinsed, then dried before they can be loaded. Next, when ammunition is fired, the inside of the case acquires a light coating of carbon. When reloading, this light carbon coating acts as a lubricant, reducing the effort needed to extract the case mouth expander. Additionally, there is evidence that the stainless media work hardens the cartridge case, which causes case separations.
5. Case Lubrication
Bottleneck and tapered cases require a light coating of appropriate lubricant to prevent them from getting stuck inside the size die. In our experience, lubricating straightwall handgun cases results in noticeably less effort needed to resize the case, and in a higher rate of production. Carbide size dies for handguns means that an unlubed case won’t have enough friction to get stuck in the die. Due to the increased surface area, a carbide rifle size die still requires the lubrication of cases. Dillon Case Lube is primarily lanolin in an alcohol carrier. The lubricant is applied by spraying it onto the cases, then waiting 10-15 minutes for the alcohol carrier to evaporate. Dillon Case Lube will not adversely affect powder or primers. Use only lubricants designed for case lubrication. Most 5 Support Your Local Dealer! 6 household general-purpose oils are not suitable for case lubing. If too much lubricant is applied to the shoulder of a bottleneck case, then you will see shallow dents form during resizing. These oil dents are cosmetic only, and have no effect on accuracy or function. Case lube should be removed from the loaded ammunition before firing it. The easiest way to do this is to use plain corncob cleaning media with a spoonful of isopropyl alcohol added to it, and vibrate the loaded ammunition about 10-15 minutes. This is sufficient to remove the case lubricant. There is no advantage to tumbling loaded ammunition longer than this.
6. Case trimming and chamfering
When bottleneck and tapered cartridges are fired, brass flows inside the case from the base towards the neck. When this fired case is resized, the neck of the case increases in length. This does not occur in straight-wall cases to the same degree. Typically, after two or three firings, bottleneck and tapered cases will have stretched beyond the maximum allowable length, and they must be trimmed. Failure to do so can result in ammunition that won’t chamber, or increased pressures from the case being forced into the bullet. Sporting Arms and Ammunition Manufacturers’ Institute (SAAMI creates and publishes industry standards for safety, interchangeability, reliability and quality) specifications recommend trimming cases back to .010” below the maximum case length. This typically allows 2-3 more firings before trimming is needed again. As long as the case length is under maximum, and not more than .020” below maximum, then minor variations in case length have no effect on accuracy or performance. Most trimmers will hold within .005-.006” variation from one case to the next. After trimming, it is sometimes necessary to use a chamfering tool to deburr the inside and outside of the case mouth. The Dillon RT1500 Electric Case Trimmer outside deburrs the case mouth as it trims. If you are loading boat-tail bullets, no inside chamfering is necessary. It is recommended to chamfer the inside of the case mouth when loading flat-based bullets.
7. Resizing and depriming
The first die to be used when reloading is the sizing/depriming die. This die pushes out the old primer, reforms the case to fit back into the chamber of the firearm and hold the projectile tightly in place. (NOTE: The crimp die is not the die that forces the case to hold the bullet.) For both rifle and handgun, the sizing die sizes the case neck to a dimension smaller than the diameter of the projectile. For straight-wall and tapered cases, the neck is opened up at the flaring die to a uniform inside diameter. For bottleneck cartridges, the depriming assembly includes a case neck expander. This enters the case before the neck has been sized. The size die then resizes the neck to smaller than the expander. When the case is withdrawn from the die, the expander opens the inside of the case neck to a uniform inside diameter. This ensures consistent case neck tension on the projectile, regardless of any neck thickness variations from one case to the next.
Dillon rifle dies have expanders made of carbide, so less effort is needed to pull the expander from the case. The sizing die performs another important function on bottleneck cases. The die pushes the angled shoulder of the case down just far enough to fit properly into the chamber. This is called headspace. SAAMI allows a variation of .007” between minimum and maximum headspace. We recommend adjusting the size die to achieve minimum headspace when loading for semiautomatic firearms. You need to use a headspace case gage to properly adjust the size die. The gage is basically a chamber, with a step machined across the base end. The bottom step is minimum headspace, the upper step maximum headspace. You will adjust the size die by sizing a lubed case, wiping the lube from the case, and dropping it into the gage. If the case does not drop in flush with the bottom step of the gage, then the size die needs to be turned down further into the machine. It is common for the size die to firmly contact the top of the shellplate when properly adjusted. Do not adjust the size die down too far, however. This will result in a case separation Hex Adjustments for Wrench Heavy, Headed Decap Pin Long, Tapered Carbide Ring Unique Floating Decap Assy. Radiused Carbide Stuck Case Remover Solid, 1-Piece Decapping Pin Size Die Polished to a High Micro-Finish Standard 7/8 x 14 Threads Carbide Expander Ball.
While shooting, where the case has to stretch excessively to seal the chamber, causing the case to break in half. When this happens the rear half of the case extracts, leaving the front half in the chamber. Should this occur, a broken case extractor tool is needed to remove the front half of the case. Straight-wall cases typically headspace on either the rim of the case, or on the case mouth. For these types of cases, adjust the size die so it just contacts the top of the shellplate when the handle is pulled down. On Dillon bottleneck rifle size dies, the depriming assembly will also function as a stuck case remover, if you follow the instructions. Do NOT try to unscrew the depriming assembly, as this will disassemble it. On other brands of resizing dies, in order to remove a stuck case you need to drill out the flash hole, thread it, and use a bolt and a spacer to extract the stuck case. This is an annoying task at best, so don’t under-lubricate cases.
8. Priming
As we have already covered, there is no reason to clean primer pockets on any American-made ammunition dating from after the early 1960s. One hazard that can occur is called a “ringer.” A ringer typically occurs when fired brass has been left exposed to the elements for a while, and moisture gets into the primer pocket. This leads to corrosion and weakness in the primer cup. When this case is deprimed, the anvil and bottom of the primer cup get pushed out, but the sides of the primer cup remain in the primer pocket. Attempting to seat a primer will fail, sometimes resulting in detonating the primer. Remember, if normal force won’t seat a primer, stop and figure out why.
On most Dillon reloading machines, primers are seated into the case by pushing the handle forward at the end of the upstroke of the handle. When beginning to reload, it is recommended to make this forward push a separate movement, to ensure all primers are fully seated. If your benchtop is plywood, it is possible the top will flex sufficiently to prevent proper primer seating. We suggest a benchtop of at least 1” thick particleboard. Primers should be seated to slightly below flush. A seated depth between .002-.009” is acceptable. Seating deeper than this can crack the primer compound in the cup, resulting in a misfire.
If you attempt to fire a cartridge, and it fails to fire on the initial firing pin strike, yet goes off on the second strike, odds are the primer was not seated deep enough to begin with. You cannot substitute large rifle for large pistol primers. Large rifle primers are about .008” taller than large pistol primers. Additionally, rifle primers of both sizes have thicker cups than do pistol primers. As a rule they do not interchange. Some primer pockets, notably cases of foreign manufacture and military cases, can have tighter primer pockets than Americanmade cases. This means it may require a greater effort to seat a primer, or the primer may not seat as far below flush as in domestic commercial cases. It is recommended to only store primers in their original packaging. Avoid prolonged exposure to temperature extremes, as this can shorten the shelf life of primers.
9. Flaring
As a general rule, only straight-wall and tapered cases have the case mouth flared outward to aid in seating the bullet. Bottleneck cases do not get flared. The exception to this is when loading cast lead projectiles into bottleneck cases, but that is more specialized, and beyond the scope of this document. The Dillon powder measure is activated by the case pushing the powder funnel upward, camming the powder bar over. On straight-wall and tapered cases, this funnel both expands the inside of the case mouth as well as flaring it. To ensure the complete movement of the powder bar, we recommend flaring the case mouth at least .010” up to .020” larger than a sized, unflared case measures. As we already noted, the size die resizes the case neck to smaller than it needs to be. The reason for this is the case mouth thickness will vary among the different manufacturers. By under-sizing the case mouth, then pushing the expander into it, the case mouth will have a uniform inside dimension regardless of the brand. Now if your brass is new, or has been cleaned in liquid media, then there is no carbon residue on the inside of the case to act as lubricant on the expander portion of the funnel. This allows the brass to gall, or build up brass residue on the expander por9 Support Your Local Dealer! tion of the funnel. After prolonged use you can often see vertical brass lines on it. Use a wire wheel, Scotchbrite pad or steel wool to remove this brass deposit from the funnel. We recommend scrubbing it lightly every 25- 35 cases.
10. Powder charge
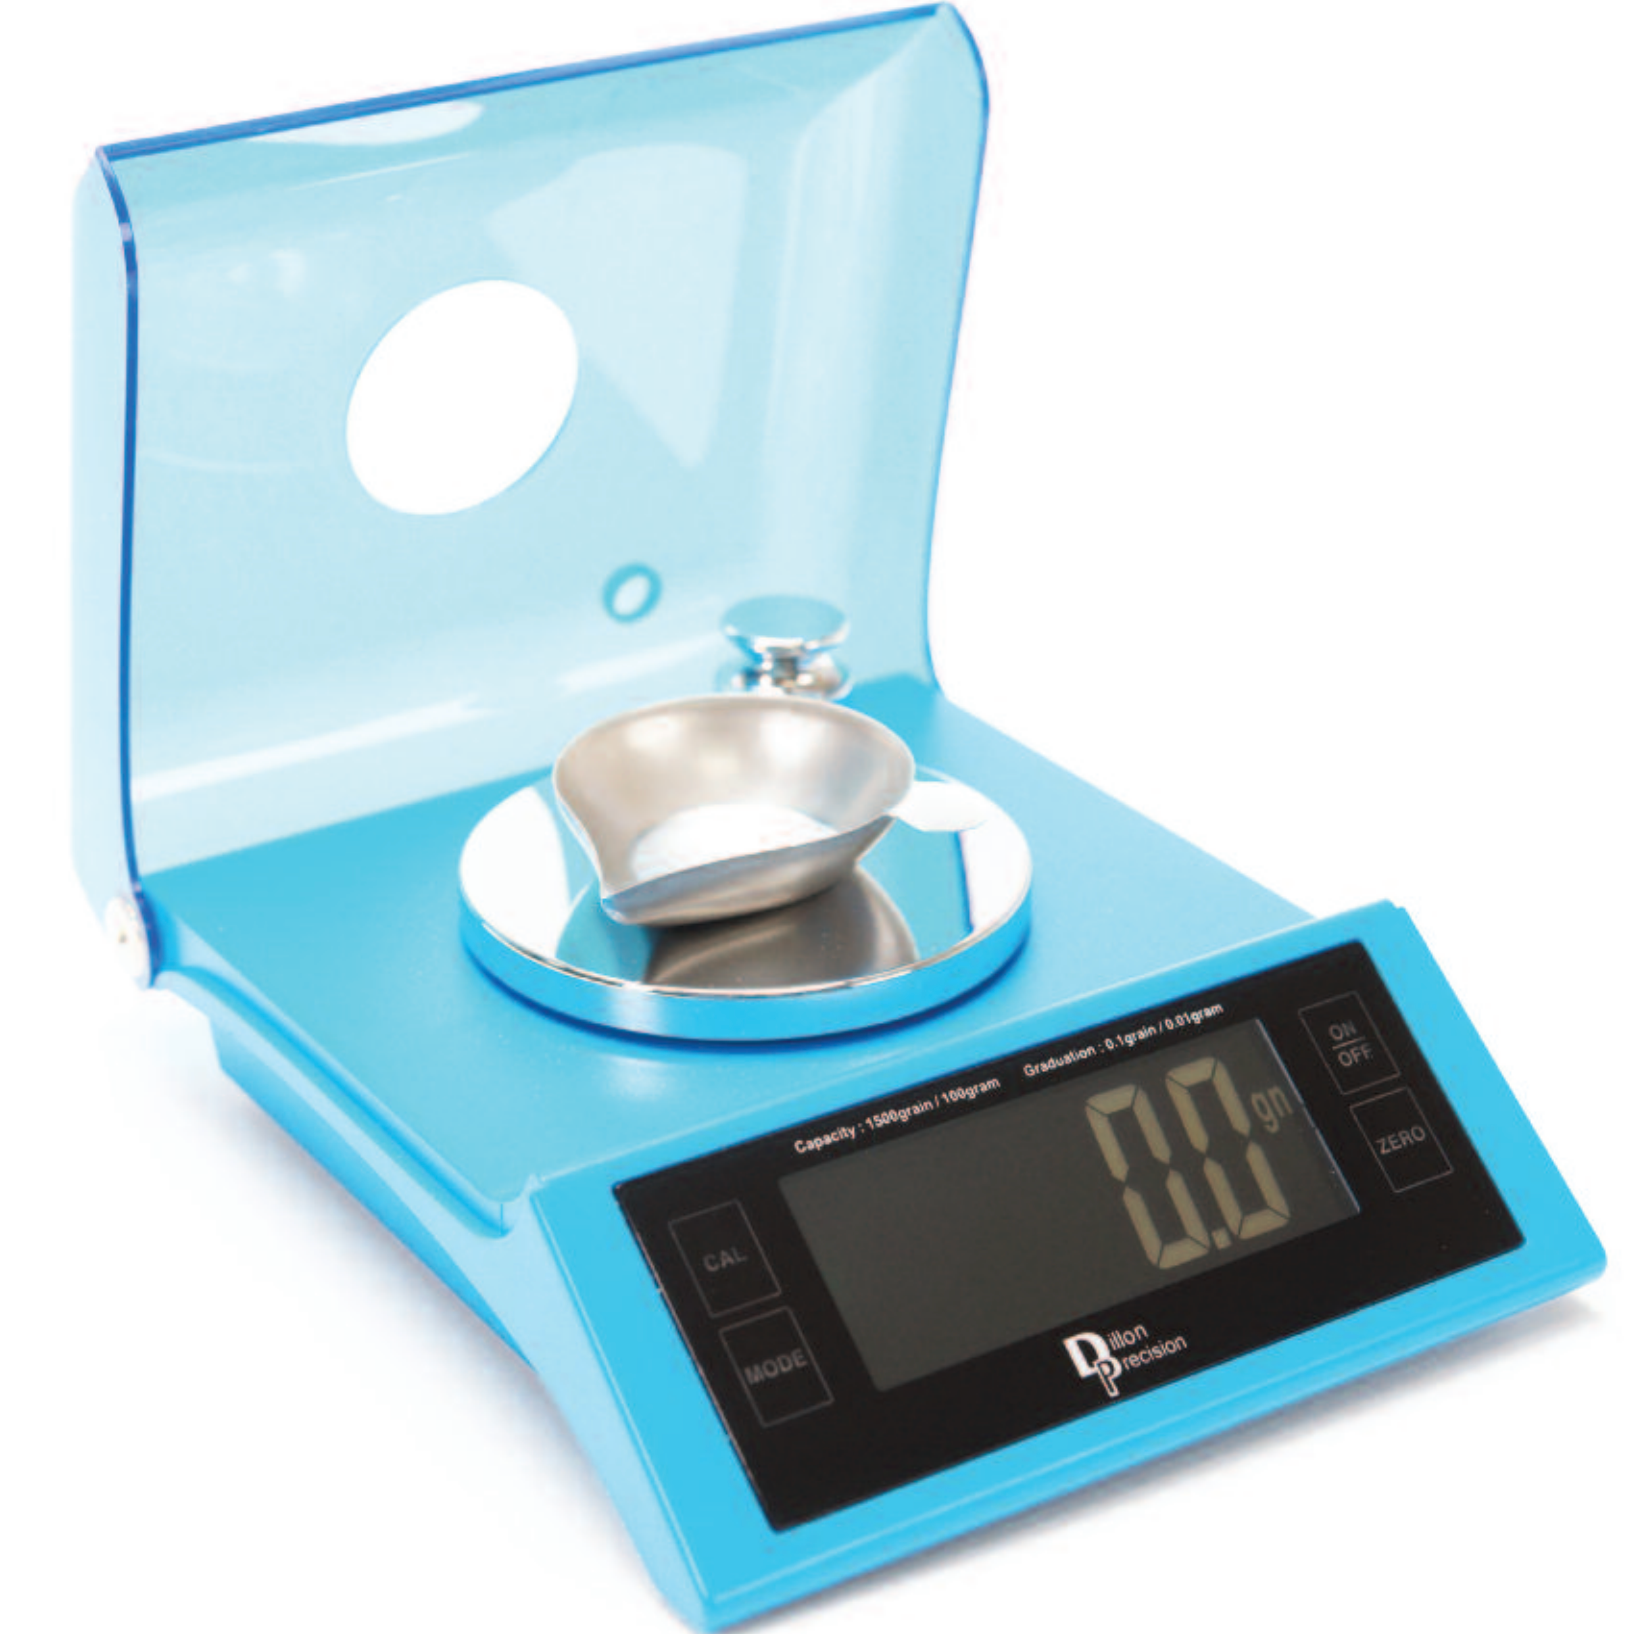
The industry standard for accuracy of a powder scale is +/- .1 grain. A grain is a unit of measurement, not merely a granule of powder. There are 7000 grains per pound. Use only pressure-tested loading data from a reliable commercial source. Never guess. Manufacturers follow a general rule when developing loading data. Fire 20 rounds of the exact same load, pressure-testing all of them. If any one of those 20 rounds has pressures above same maximum level, then that load is too hot. Pressure curves for powder are not straight. Most powders reach catastrophic levels in a very small volume increase. So don’t second-guess the manufacturers’ data. If stored under best conditions, powder has a shelf life in excess of 60 years. As with primers, store powder only in its original container, and avoid temperature extremes. When powder goes bad, it has a very bitter, acrid odor. Normally powder has a faint solvent odor. Do not expect powder charges to have zero variation. Below is a chart for 10 rounds of disassembled factory 30-06 ammunition, loaded with an unknown type of ball powder.
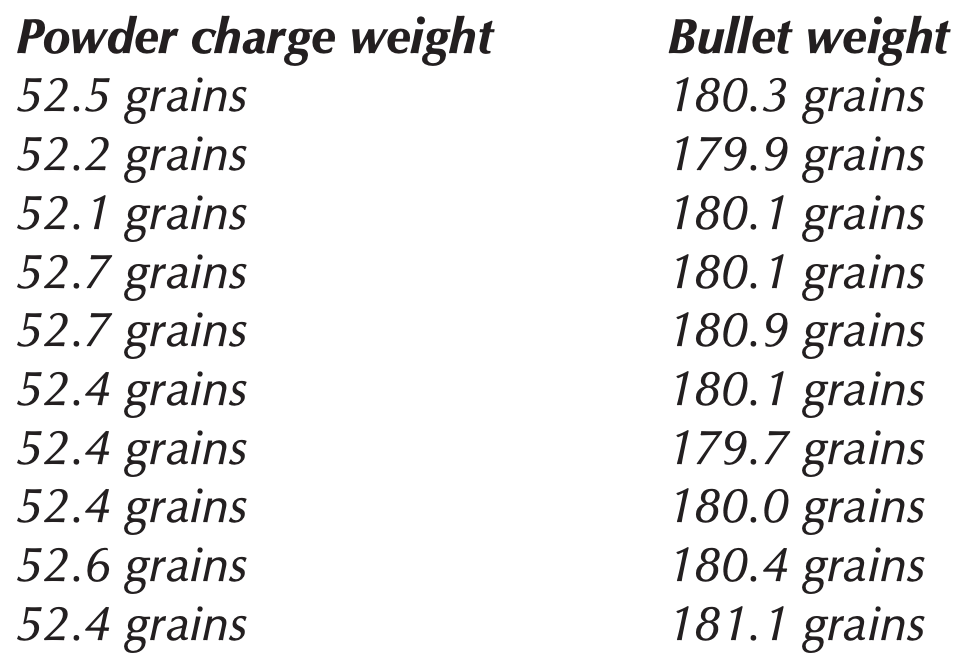

Variation: 0.6 - 0.7 grain
Different shaped powders will dispense with different degrees of consistency. The variations you should expect are as follows:
Ball/spherical powder +/- .1 grain
Medium flake powder, such as Red Dot, 700-X most will be +/- .2 grain
Large flake powder, such as Unique, 800-X +/- .2 grain, occasional +/- .3 grain
Some rifle powders are extruded, the granules are long and thin, like broken pieces of lead for mechanical pencil. These powders can be challenging to reload in sub- .30 caliber rifle cases, as the powders can logjam inside the powder funnel. When this happens, the case being charged will receive only a partial load of powder. The rest of the charge is stuck in the funnel. Then it is possible for the next case to receive an overcharge, when the next load of powder knocks it loose. Another possibility is that the powder is jostled loose when the case is withdrawn from the funnel, and the powder spills all over the shellplate. Many extruded powders are made in shorter lengths, to minimize this. Please try to avoid using full-length extruded powders in sub-.30 caliber cartridges.
The variations to expect with extruded powders:
Short-grained extruded, including Alliant Reloader series, Hodgdon Short-Cut powders +/- .2 grain, occasional
The Dillon powder measure includes two powder bars, the small (installed at the factory) and the large. The small powder bar has a range of approximately 2.7 grains up to approximately 20 grains. The large powder bar has a range of approximately 10 grains to approximately 50 grains. These capacities are guidelines only, and will vary greatly depending upon the density of the powder. Some very bulky powders, such as IMR Trail Boss, require the large powder bar to dispense powder charges larger than 5 grains. Offered as options are the extra small and magnum powder bars. The extra small powder bar has a lower minimum charge, going down to approximately .5 grain. The magnum bar has a range of approximately 45 grains up to approximately 72-82 grains, depending upon whether an extruded (72) or ball/spherical powder (82) is being used.

11. Bullet Seating
When adjusting a bottleneck rifle bulletseating die, for best accuracy we suggest adjusting as follows: First, always have a lubed, fired case in station one. This ensures the same upward pressure on the toolhead as you will have when actually reloading ammunition. Put a sized, empty case into the shellplate at the bullet seating station. Pull the handle down, elevating the shellplate and empty case. Using just your fingers, screw the seat die body down until it stops against the case, then back it up 1/8 th of a turn. Finger-tighten the die body lock ring. Now back the bullet-seating stem up at least 6-8 turns. Lift the handle up on the machine, set a projectile on the case mouth, and pull the handle down again. Leaving the handle down, with your fingers screw the bullet seating stem down until you feel it contact the projectile. Now lift the handle up about two inches, and screw the bullet-seating stem down one full turn. Push the handle down until it stops. This will partially seat the projectile into the case. Now lift the handle up and remove the cartridge from the shellplate. Using calipers, measure the overall length of the cartridge.
On Dillon rifle dies, one rotation of the bullet seating stem seats the bullet .055” deeper. Do the math, adjust the seat stem down as necessary, reseat the projectile, and check the measurement. Repeat under through trial and error you get the seating stem properly adjusted. Once properly adjusted, run the cartridge back up into the seating die. With the handle down and the cartridge up in the die, tighten the die body lock ring first, then tighten the bullet seating stem lock ring. Doing this improves the concentricity of the seated projectile. Be aware that no two projectiles are exactly alike, and you WILL have variations in the cartridge overall length.
The bulletseating stem usually contacts the side of the projectile, and pushes it down a fixed distance. Where the diameter is on the projectile can vary, as little as a few thousandths on premium match projectiles, to over .025” on bulk-produced projectiles. When loading handgun cartridges, the seating die will include a variety of seating stems. To minimize variations in cartridge overall length, match up the profile of the projectile with the seating stem that best matches it.
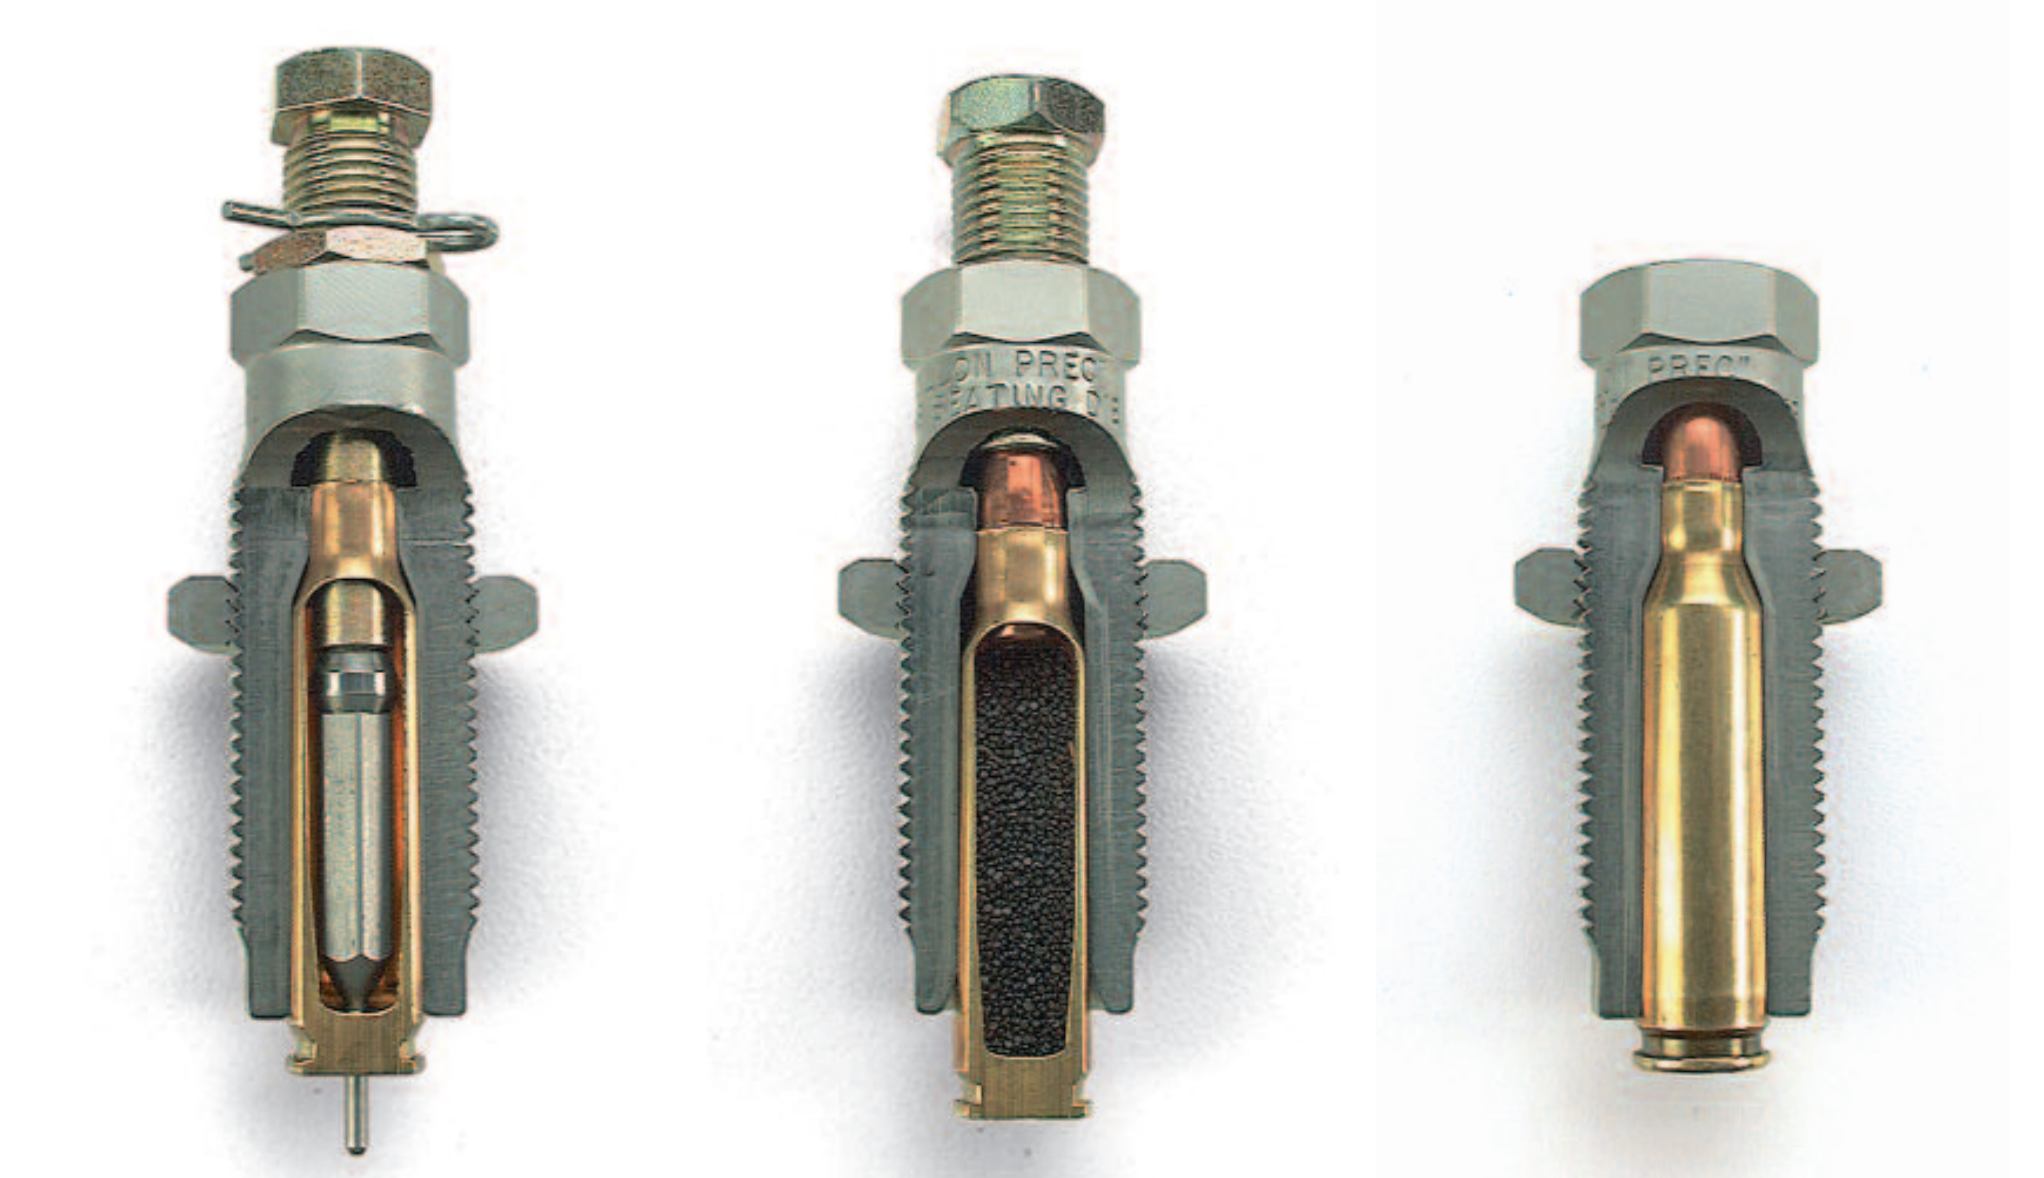

12. Crimping
Keep in mind that neck tension from the size die is what holds the projectile in place. The purpose of the crimp die is to remove any case mouth flaring, squeeze the case mouth firmly against the sides of the projectile (taper crimp), and on heavy-recoiling firearms, it prevents the bullet from sliding in the case due to recoil (roll crimp). There is NO advantage in over-crimping. If you over crimp a cartridge, the case neck immediately behind the crimp bulges out, allowing you to spin the projectile in the case. This resultant bulging can prevent ammunition from chambering as well.
13. Final inspection
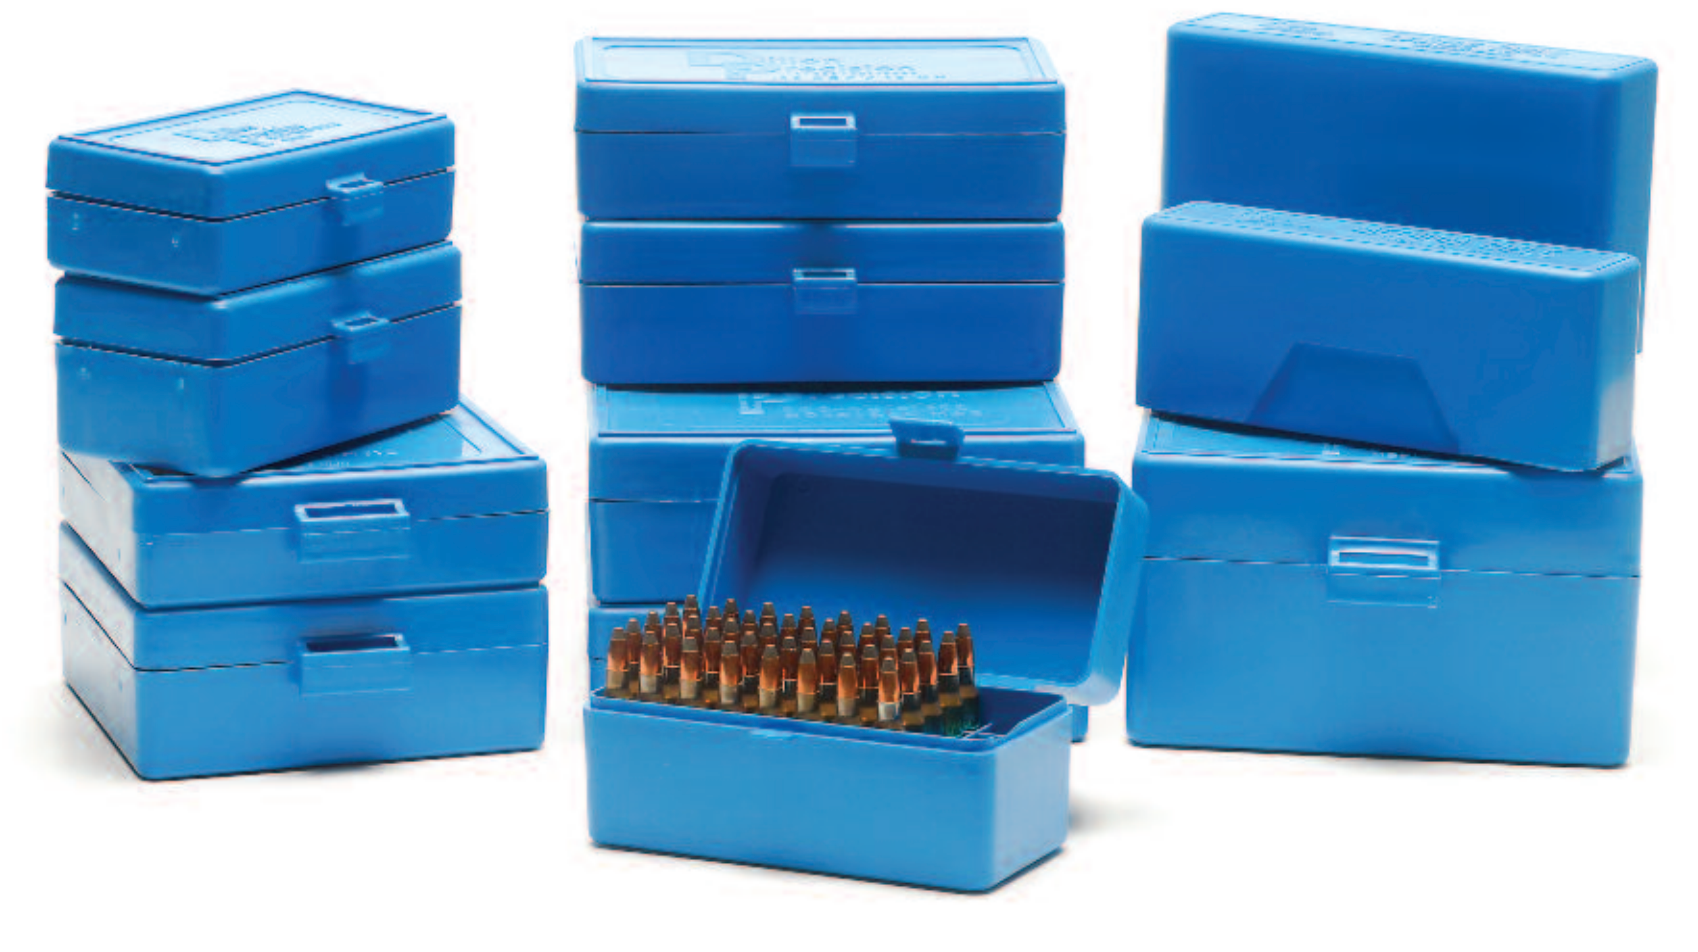
When initially adjusting your dies, it is recommended to test your ammunition for proper fit. Use either a chamber gage, or load a dummy cartridge with no powder or primer, and check it in the actual firearm the ammunition will be fired in. Nothing is worse than loading a quantity of ammunition only to find out it won’t work. A chamber gage is essentially just the chamber-portion of a firearm barrel. These are machined to SAAMI minimum chamber dimensions. The SAAMI maximum cartridge dimensions for any caliber are always going to be smaller than the minimum chamber dimensions are for that caliber. Ammunition that passes a chamber gage check will fit any firearm chamber made to SAAMI specifications. A headspace case gage will only check the headspace and empty case length dimensions, and will not check the other dimensions that might prevent a cartridge from chambering. Loaded ammunition should be stored in either plastic boxes, or in GI steel ammunition cans. This protects the ammunition from the elements, and from dust, lint, or other objects that can interfere with proper chambering and function. SupportYour Local Dealer! 14 Ammunition that is defective in some way can often be safely disassembled, and some or all of the components reused. A kinetic bullet puller is the most popular device for this. Resembling a hollow hammer, the kinetic bullet puller has a collet that holds the case upside-down inside of the puller. A few light, rapid taps are sufficient to cause the projectile to slide forward and out of the case. Then the components can be reused. Do not use a kinetic bullet puller to disassemble rimfire ammunition, live ammunition with a firing pin strike, or some exotic foreign military ammunition, as some projectiles are explosive, and have an impact detonator.
14. Machine Maintenance
Not all lubricants are the same, and not everything you use as a lubricant IS a lubricant. On Dillon reloading equipment, the steel ram gets lubricated with motor oil. Every other part that should be lubricated should be greased. By definition, oil is a liquid, whereas grease is a solid. NEVER ever use any of the following as a lubricant on a Dillon machine: WD-40, Break-free CLP, lightweight gun or sewing machine oil. WD40 is a penetrant, designed to displace water. If your machine has rust, use WD-40 and steel wool or a scrubbing pad to scour away the rust. Then wipe off the WD-40 and apply the appropriate lubricant.
Where high humidity can cause rust, apply any paste automotive car wax to the steel parts to act as a vapor barrier. It does need to be removed before use on some parts, such as the interior of a die. When not in use, keep your powder scale covered. The weight of dust/dirt on a scale will alter the shown weight. Dillon offers a cover for the D-Terminator digital powder scale. For a balance beam scale, a 15 plastic breadbox makes an ideal cover. When not in use, cover your reloading machine. This not only keeps dust and grit from the moving parts, it also reduces the chances of unauthorized fingers making adjustments you aren’t aware of. Do not use a plastic trash bag to cover a machine, as it will trap moisture in with the machine. Use a properly designed cover, such as Dillon sells, or an old pillowcase to cover the machine when not in use. The advantage of the Dillon machine cover is that it is lockable.


Do you engage in....Unprotected Reloading?
We all know that safety is our first concern in reloading. Or do we? Just to refresh one’s memory, here are a few tips: NO SMOKING – As much as we love a good cigar, the reloading area is one case where smoking is really bad for your health. BE GENTLE WITH PRIMERS – Primers are designed to explode when you hit them…either with a firing pin or a coat hanger or anything else. If you encounter a stuck primer, proceed with extreme caution. If they’re stuck inside the primer magazine or pickup tube, flood the tube with a penetrating oil like WD-40, and place the tube gently in the trash. Then call us and we’ll send you a free replacement, no questions asked. Another thing…NEVER try to decap live primers. We know, you’ve done it and nothing happened. You should remain so lucky.
DON’T REMOVE SAFETY DEVICES – We didn’t design a heavy tubular steel primer magazine shield into our reloaders simply because we get off on overengineering. It is, quite literally, a face-saving device. If the unthinkable happens and all the primers go off, the force of the blast will be directed straight up, and not straight into your classic features. SAVE YOUR EYES AND EARS – Get a pair of safety glasses, either from us or someone else. And WEAR THEM; they’ll protect your vision and make you look like you know what you’re doing. Ear protection? Absolutely! If you ever hear a box of primers going off in an enclosed area, its probably the last clear thing you’ll ever hear. Also, hearing protectors block out a lot of extraneous noise and help you focus on what you’re doing…which is not a bad idea when you’re dealing with explosive and flammable materials.
DON’T GET CREATIVE WITH LOADS – Whatever your political persuasion, be a conservative when it comes to reloading Do You Engage in...Un 19 specs. Get yourself a couple of good reloading manuals and follow their directions, starting on the low side. Let sanity rule; brass fragments in your forehead are not a sign of virility (or intelligence). STRIVE FOR PERFECTION – Check each round as you load. And, every 50 rounds, check your finished rounds with a case gage or dial caliper. It does not hurt to have a reputation for being finicky in this regard, particularly when it’s accompanied by subMOA results.
CLEAN UP YOUR ACT – Loose powder, primers and other flammables make for a messy, dangerous and depressing workplace. Invest in a storage cabinet and a whiskbroom. We offer a full range of such handy organizers as toolhead stands, ammo boxes and AkroBins…all in a tasteful shade of blue. It makes the whole area look very neat and professional.
CONCENTRATE. FOCUS. PAY ATTENTION – It is truly said, never shoot next to a man who watches “Baywatch” reruns while reloading. Just like using a table saw, one moment of inattention while reloading could cost you dearly. And just to remind you when specific areas need attention, Dillon has designed such things as the Primer Early Warning System, which is included with our reloaders, and the Low Powder Sensor, which costs extra (but is worth it if youve ever run an indeterminate number of reloads with no powder in the hopper). FINALLY…WHEN IN DOUBT, CALL US – We welcome your questions and, yes, even your complaints, which help us improve our products and service. In all our years of overthe-phone diagnosis, we’ve become pretty darn good at pinpointing problem areas and resolving them. We won’t quit until your Dillon equipment is working the way you (and we) expect it to, and it won’t cost you a cent.
Call us toll free at 800-223-4570.
